

Farm Stories
Healthy, Local Fat: Rendering Pork Fat into Lard
Healthy Fats,
Local Fats
The Benefits of Leaf Lard & Rendering Pork Fat
by Mariah Notini

It’s the beginning of March, and just when Vermont gives you a taste of spring, she hits you with another snow storm… I’ve been dreaming of the coming months, full of fresh vegetables and long days full of sun. It’s in these moments that I get my inspiration for a project in the kitchen. Kitchen projects are always what I fall back on when I feel myself falling into a slump of winter blues -- they give me an excuse to spend the afternoon in my pajamas, switching between podcasts, making playlists, and bingeing Gilmore Girls.
Rendering pork (back) fat is the perfect project for these last days of laziness because, although the process takes several hours, all you have to do is stir the spoon a few times every hour. Minimal input for a big reward!
Making lard can seem intimidating at first, however I assure you that once you do it the first time, you will find it well worth pushing your comfort zone. All you need is a sharp butcher knife, a cutting board, and a heavy bottomed stockpot.
The most important part of making lard is that you obtain high quality pork fat where the pigs have been raised on pasture for most of their lives. Lucky for you, here at Bread and Butter our pigs are raised just that way. The pork in our freezers came from animals who ate fresh grass, rooted in the dirt, munched tree nuts, gorged on thousands of pounds of organic apples, and were fed organic, non-GMO, soy-free Vermont grains (talk about high quality!)
You might be thinking this is a lot to do just for some lard that you don’t know how to use… but ah-ha! To the contrary…you should know that there are many benefits to rendering pork fat and cooking with lard that go beyond an excuse to spend the day in your pajamas…
Things to know about lard:
- Lard has higher percentage of saturated fats compared to mono- and polyunsaturated fats. The higher the quality of the lard you use, the fewer polyunsaturated fats will be in the final product (this is good!). This matters not only for the essential fats you are getting when you consume the lard, but also because the percentage of saturated fat protects the more vulnerable mono/polyunsaturated fats from oxidizing with heat (which happens often with olive oil and butter). Oxidation of fats causes free radicals, which in turn can cause cell damage in our bodies.
- Lard is amazing for cooking, sautéing, and deep-frying because of its high temperature stability. It also has a very neutral flavor and gives a wonderful brown crust to vegetables and meats.
- Did I mention it’s economical?! The prices of pork fat have stayed low ($2-5 dollars/ lb) over the years compared to other high quality cooking fats. You can spend $6.00 on 2 lbs of pork fat from the farm store and yield an entire quart of lard!
- Because our pigs spend so much of their lives on pasture with little stress, eating wild weeds and rooting through the ground, our lard has a high Vitamin D content. Typically, pastured pork contains 1,000 IU’s of vitamin D per tablespoon.
- Pork lard is a LOCAL source of high quality fat, unlike coconut or olive oil that is shipped across seas…. I’m looking at you, localvores!
- Lard is wonderful to make flaky pie crusts and biscuits, as well as a good substitute for higher quality cookies and other treats where you substitute the lard for butter or hydrogenated oils.
Now that I’ve undoubtedly convinced you that rendering lard is worth your time, here is how you do it:
How to Render Fat From our Woodland Pork:
Step 1. Cut lard in ½ inch cubes, making sure to discard any bloody pieces.
Step 2. Once all of the lard is cubed, pour a ½ cup water over the lard. (I did a ½ cup for 2 lbs fat… you can adjust the amount of water based on amount of fat.) Put the pot over medium-low heat and allow water to boil off slowly, for about 45 minutes to an hour.
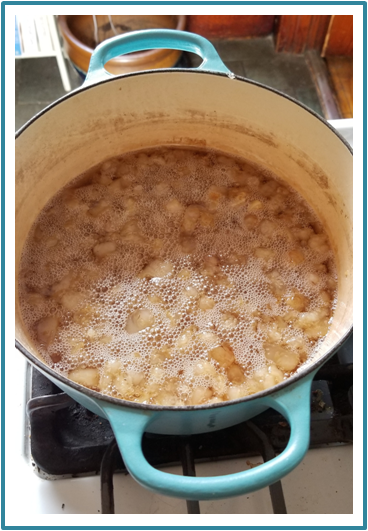
Step 3. Stir occasionally on medium-low heat until brown crisp float to the top. When you see this, you’re almost done! Eventually, the crisps will sink to the bottom and at this point you can take the pot off of the heat. This whole process can take 3-4 hours on the stove top. Remember… low and slow!
Step 4. Let cool until able to handle and then strain out fat pieces through a cheesecloth or mesh strainer into a glass jar. The fat can be stored anywhere under 100F for at least 6 months.
Step 5. Salt and eat the leftovers or use in place of breadcrumbs on a gratin!
There you have it folks! Make you own local & nutrient dense cooking fat to make every vegetable sauté and pie crust that much tastier.
So go ahead, and choose that show you have been meaning to catch up on or make some tea and snuggle up with a good novel, and let the rendering begin!
Here is a simple recipe from bon appetit for oatmeal raisin lard cookies!
May you be healthy, wealthy, and full of fat this spring!
Xo, Mariah